
Using Verdigris API with Postman
Before starting:
- Make sure you have access to the Postman client in one of two ways:
- Download the Postman App on your Apple or Windows machine. (does not require a Postman account)
- Access Postman using web browser.(requires a Postman account)
- Make sure you have the latest version of Postman downloaded on your local machine
- Create a new Verdigris API Key in Verdigris Admin Console.
See "How to Create or Manage API Keys" for more details. - Save the Client ID and Client Secret as "Variables" in Postman
Get Started
-
Under your preferred Workspace, create a New Collection. See example "Verdigris APIs" in the image above.
-
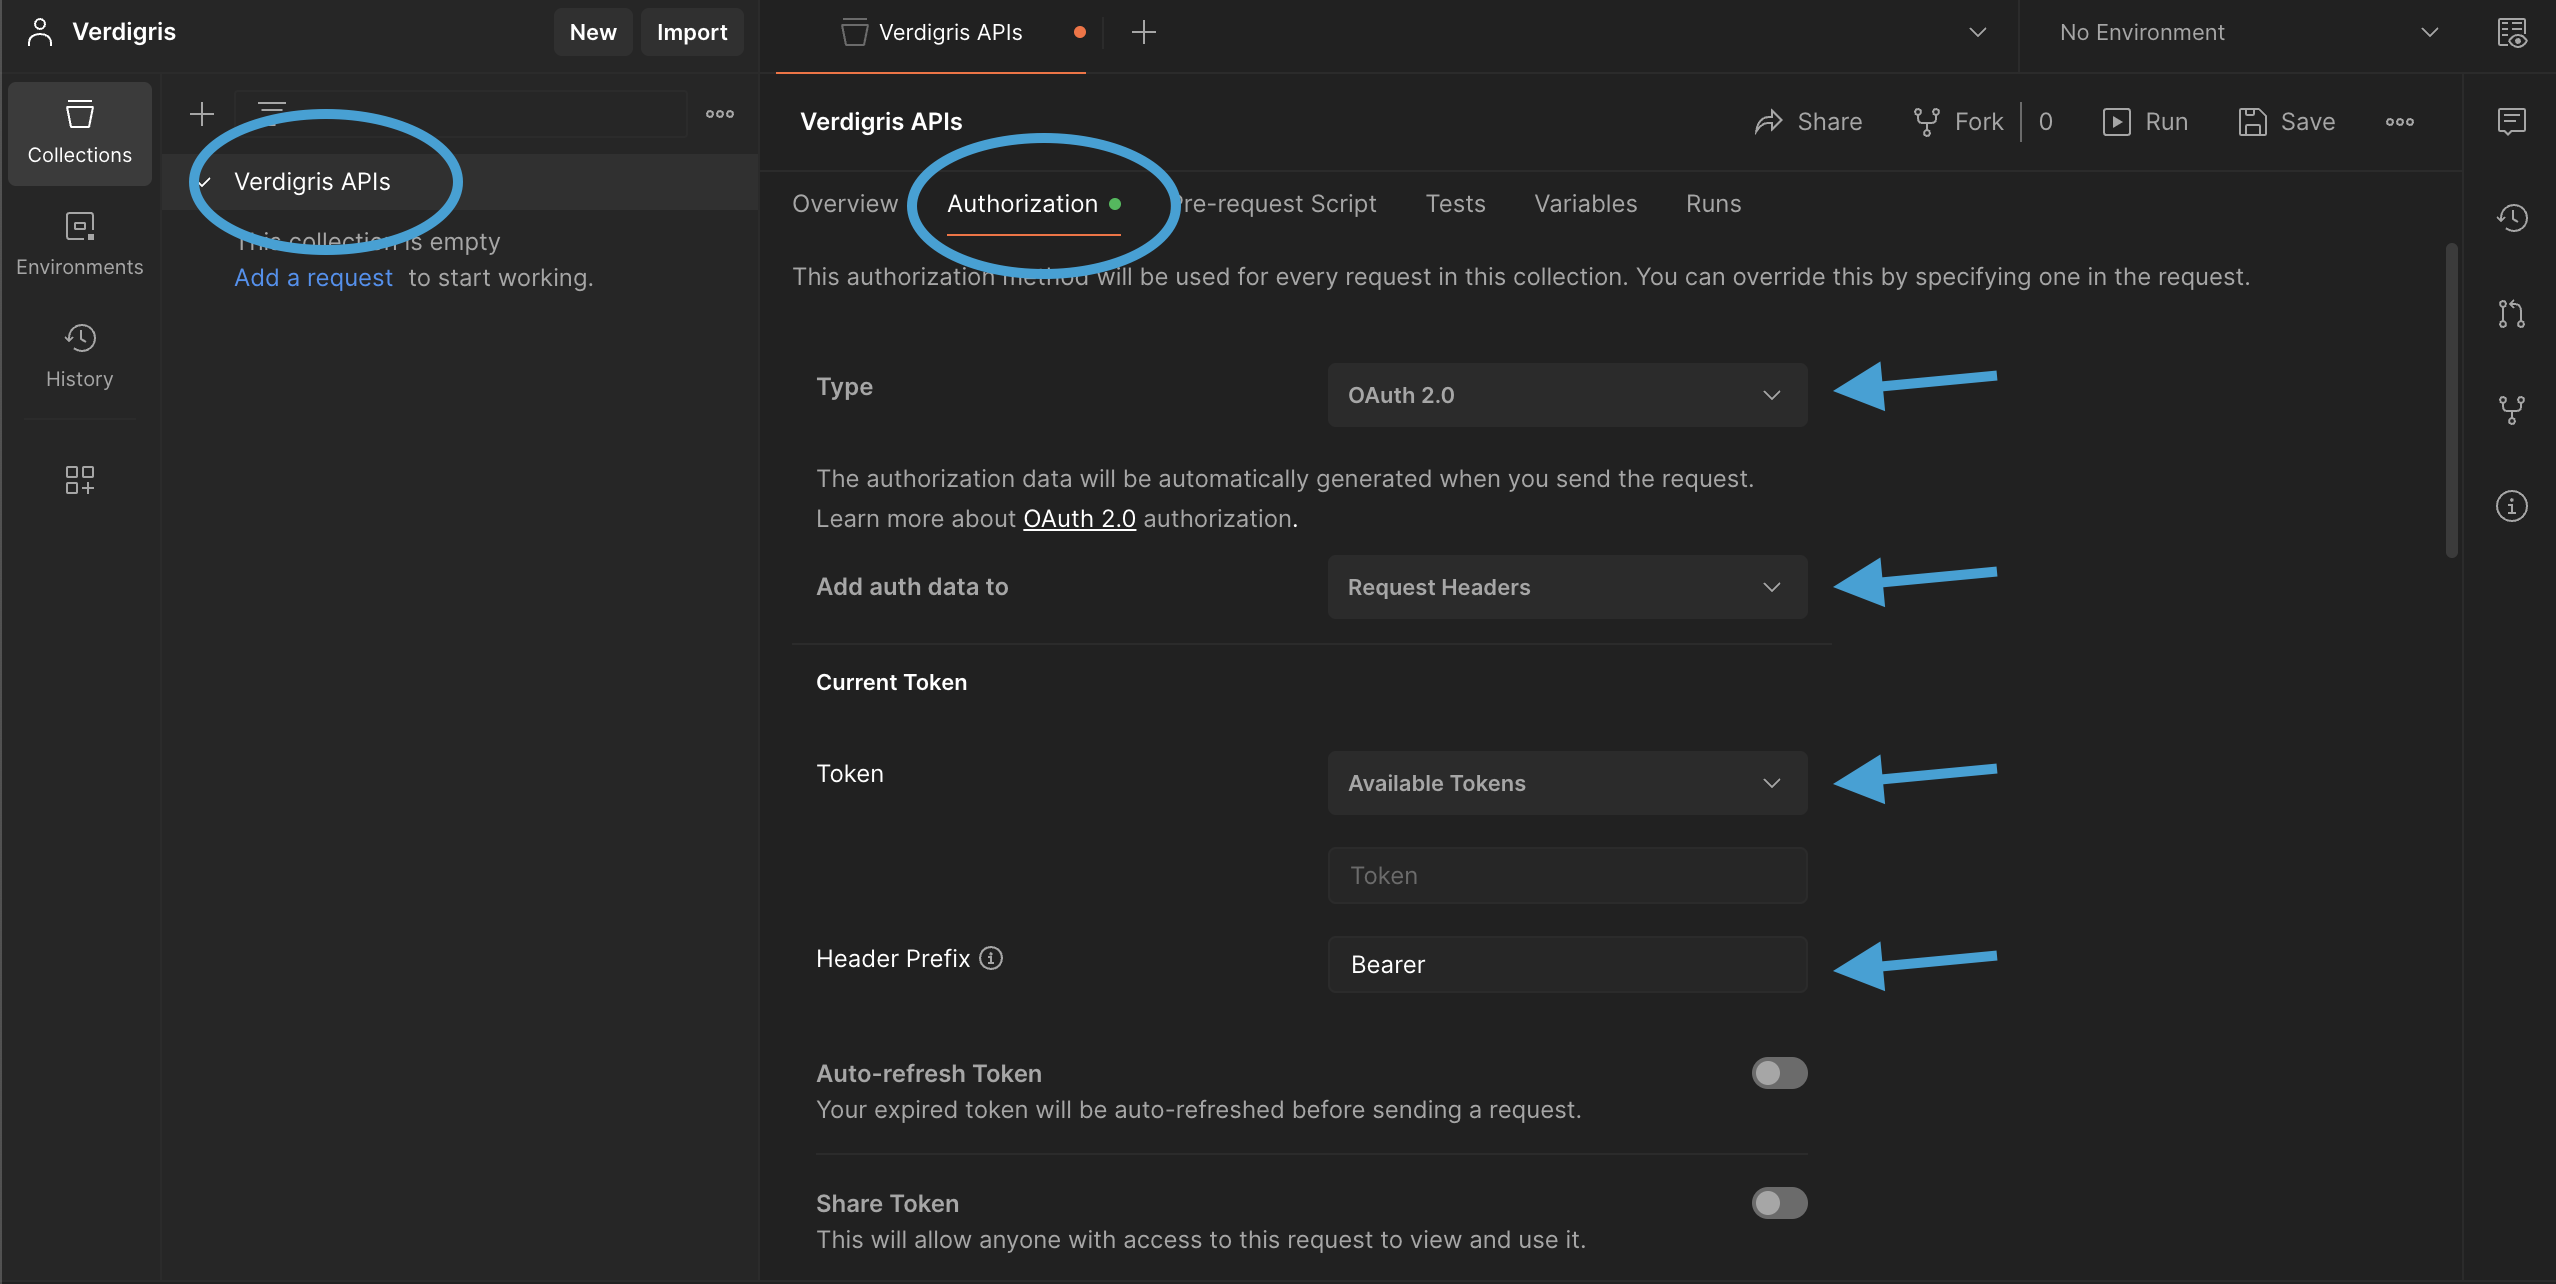
Navigate to “Authorization” tab
-
Enter below values for:
- Type: Select "OAuth 2.0"
- Add auth data to: Select "Request Headers"
- Token: Select "Available Tokens" or skip
- Header Prefix: Select "Bearer"
- Keep Auto-refresh Token and Share Token fields inactive
Note: For older versions of Postman, you may need to click "Edit token configuration." before proceeding
IGNORE this note, if you are using the latest Postman version (v10 or higher).

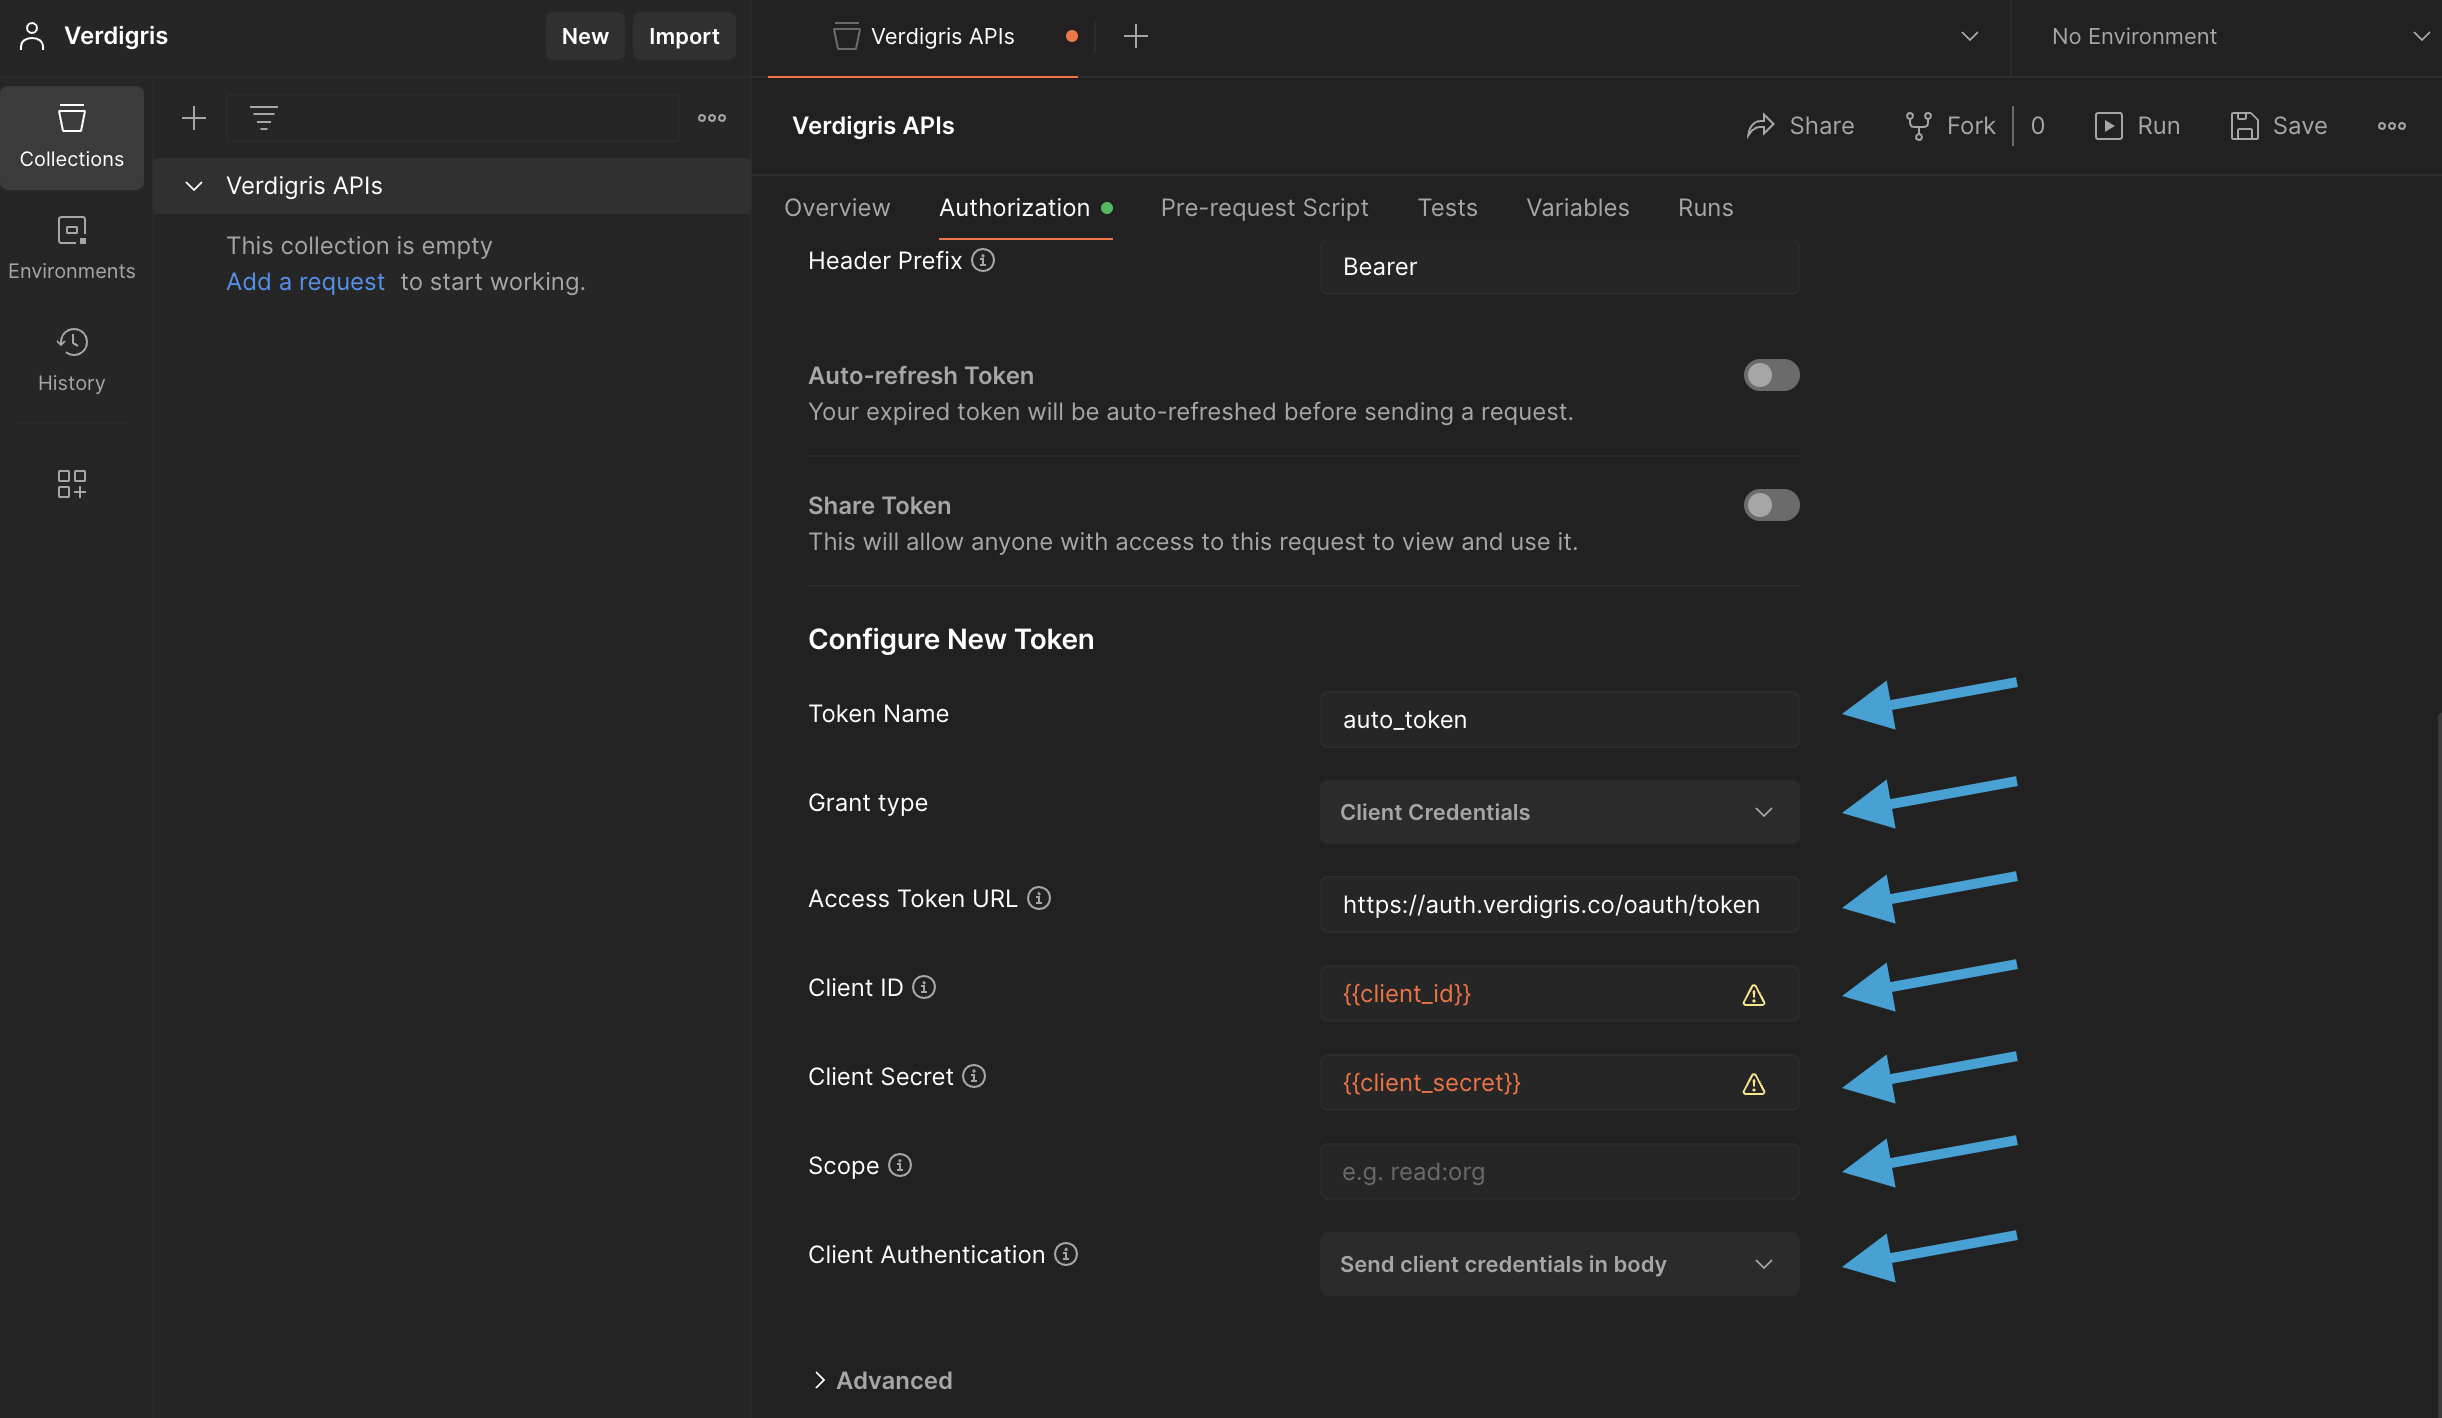
- Scroll Down to Configure New Token and enter below values for:
- Token Name: Enter "auto_token"
- Grant Type: Select "Client Credentials"
- Access Token URL: Enter "https://auth.verdigris.co/oauth/token"
Note: Copy and pasting a link may introduce angle brackets "< >" at the start and end of the link. Please remove those before saving. - Client ID: Enter your Client ID from the Verdigris Admin Console
It is highly recommended to use the Postman Variable to store your "Client" credentials - Client Secret: Enter your Client Secret from the Verdigris Admin Console
It is highly recommended to use the Postman Variable to store your "Client" credentials - Scope: skip; leave it empty
- Client Authentication: Select "Send client credentials in body"
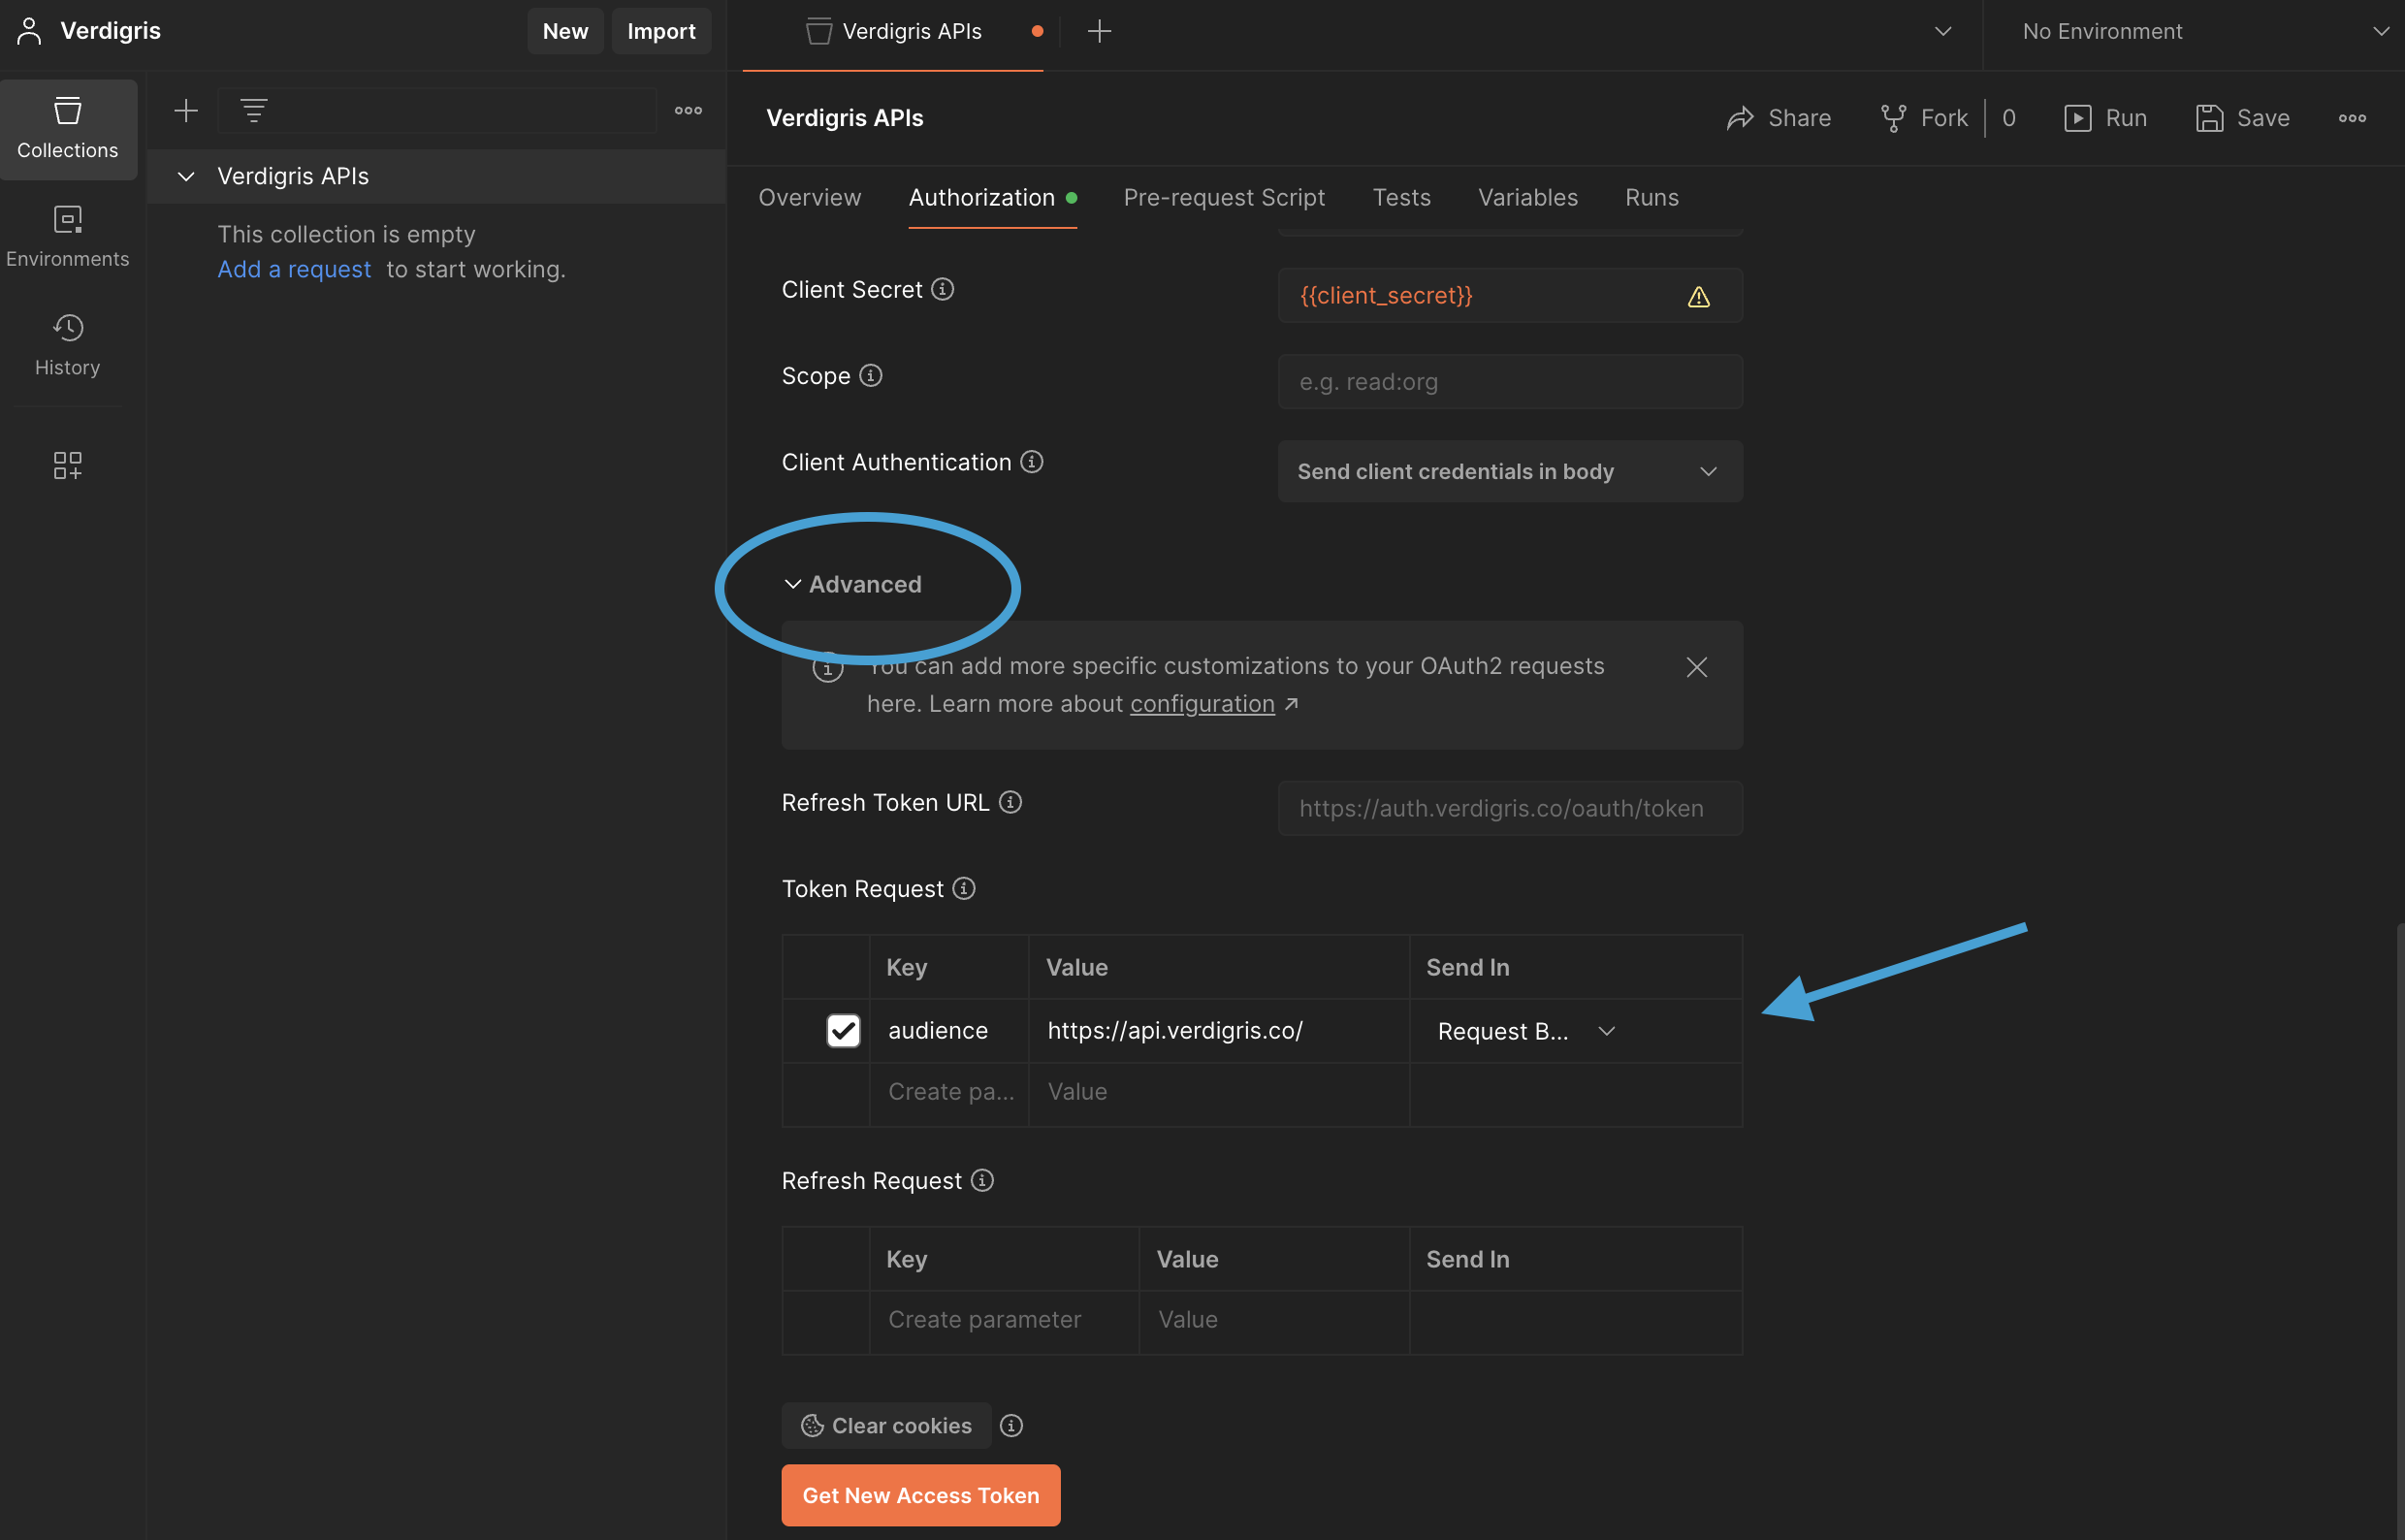
- Scroll down and click "Advanced."
- Under "Token Request" section, create a parameter by entering below values under:
- Key: Enter "audience"
- Value: Enter "https://api.verdigris.co/"
Note: Copy and pasting a link may introduce angle brackets "< >" at the start and end of the link. Please remove those before saving. - Send In: Select "Request Body"
- Double check all information is entered exactly as indicated in this support article.
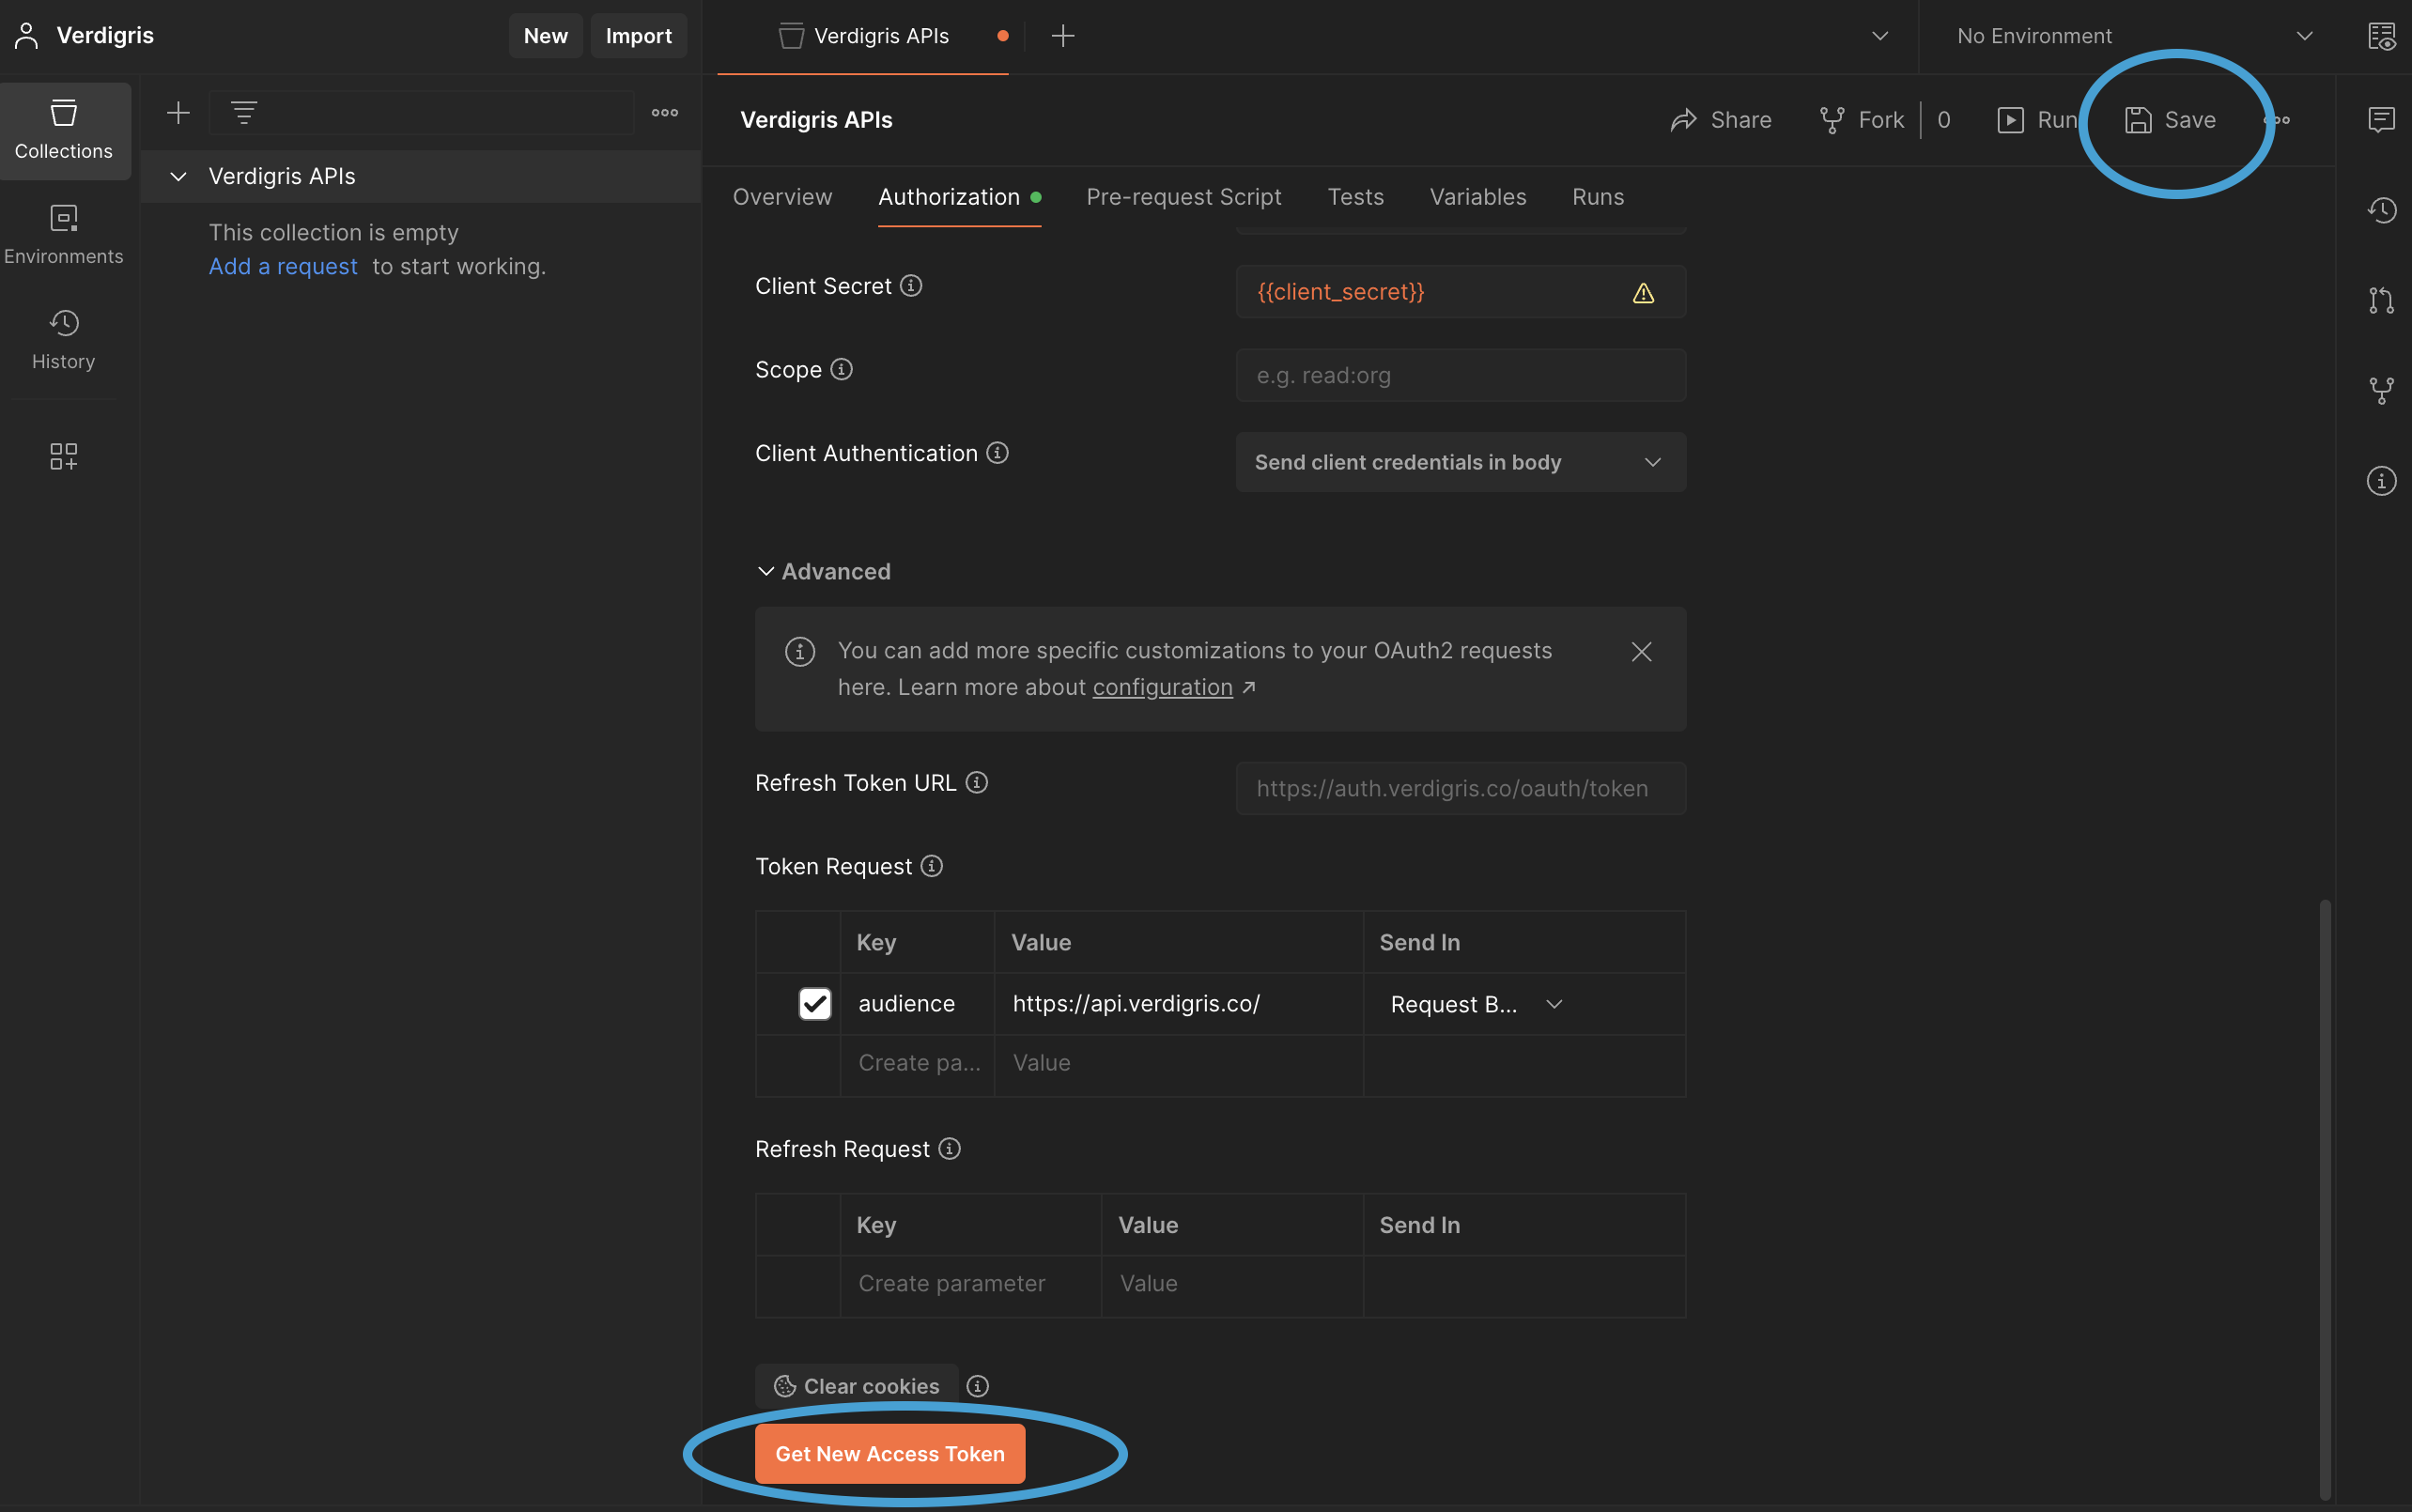
- Click "Save" on the top right of the tab
- Click "Get New Access Token" at the bottom of the tab

- An "Authentication complete" dialog box appears to confirm that all authentication settings have been entered correctly.
- Click "Proceed" or wait for a few seconds to see your newly generated Bearer Token.
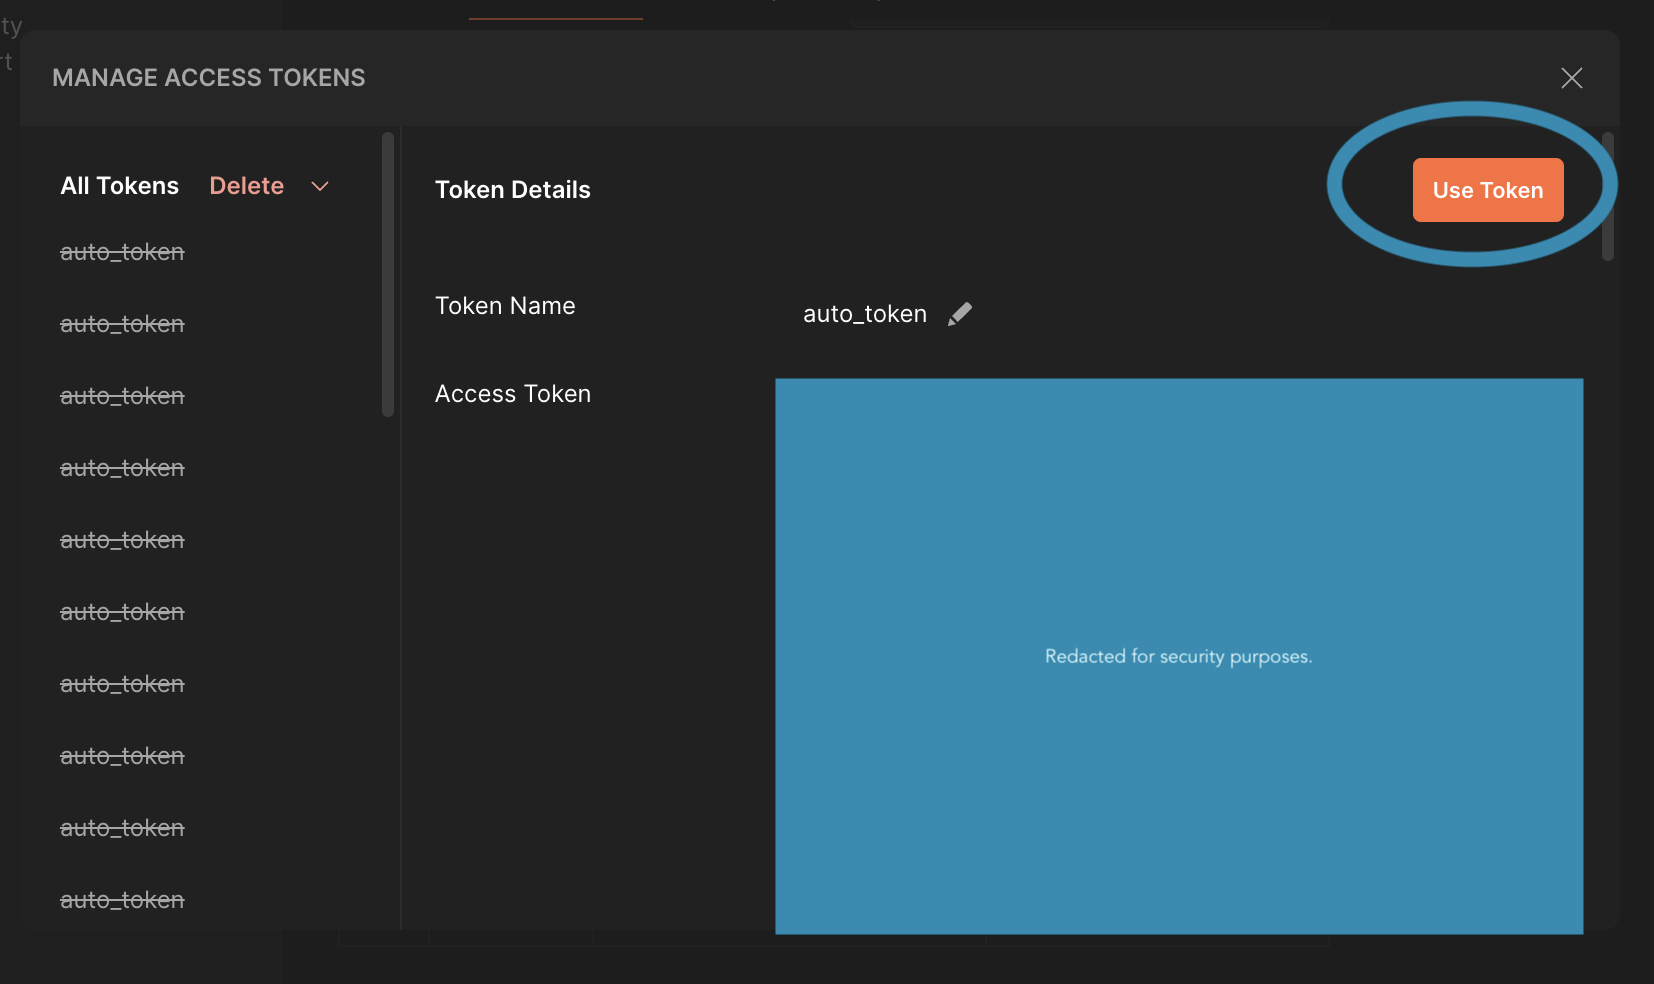
- The value in "Access Token" is also sometimes called a "Bearer Token". Click "Use Token."
The Access Token auto-expires in 60 minutes. Follow steps 9-12 to regenerate a new Access Token.
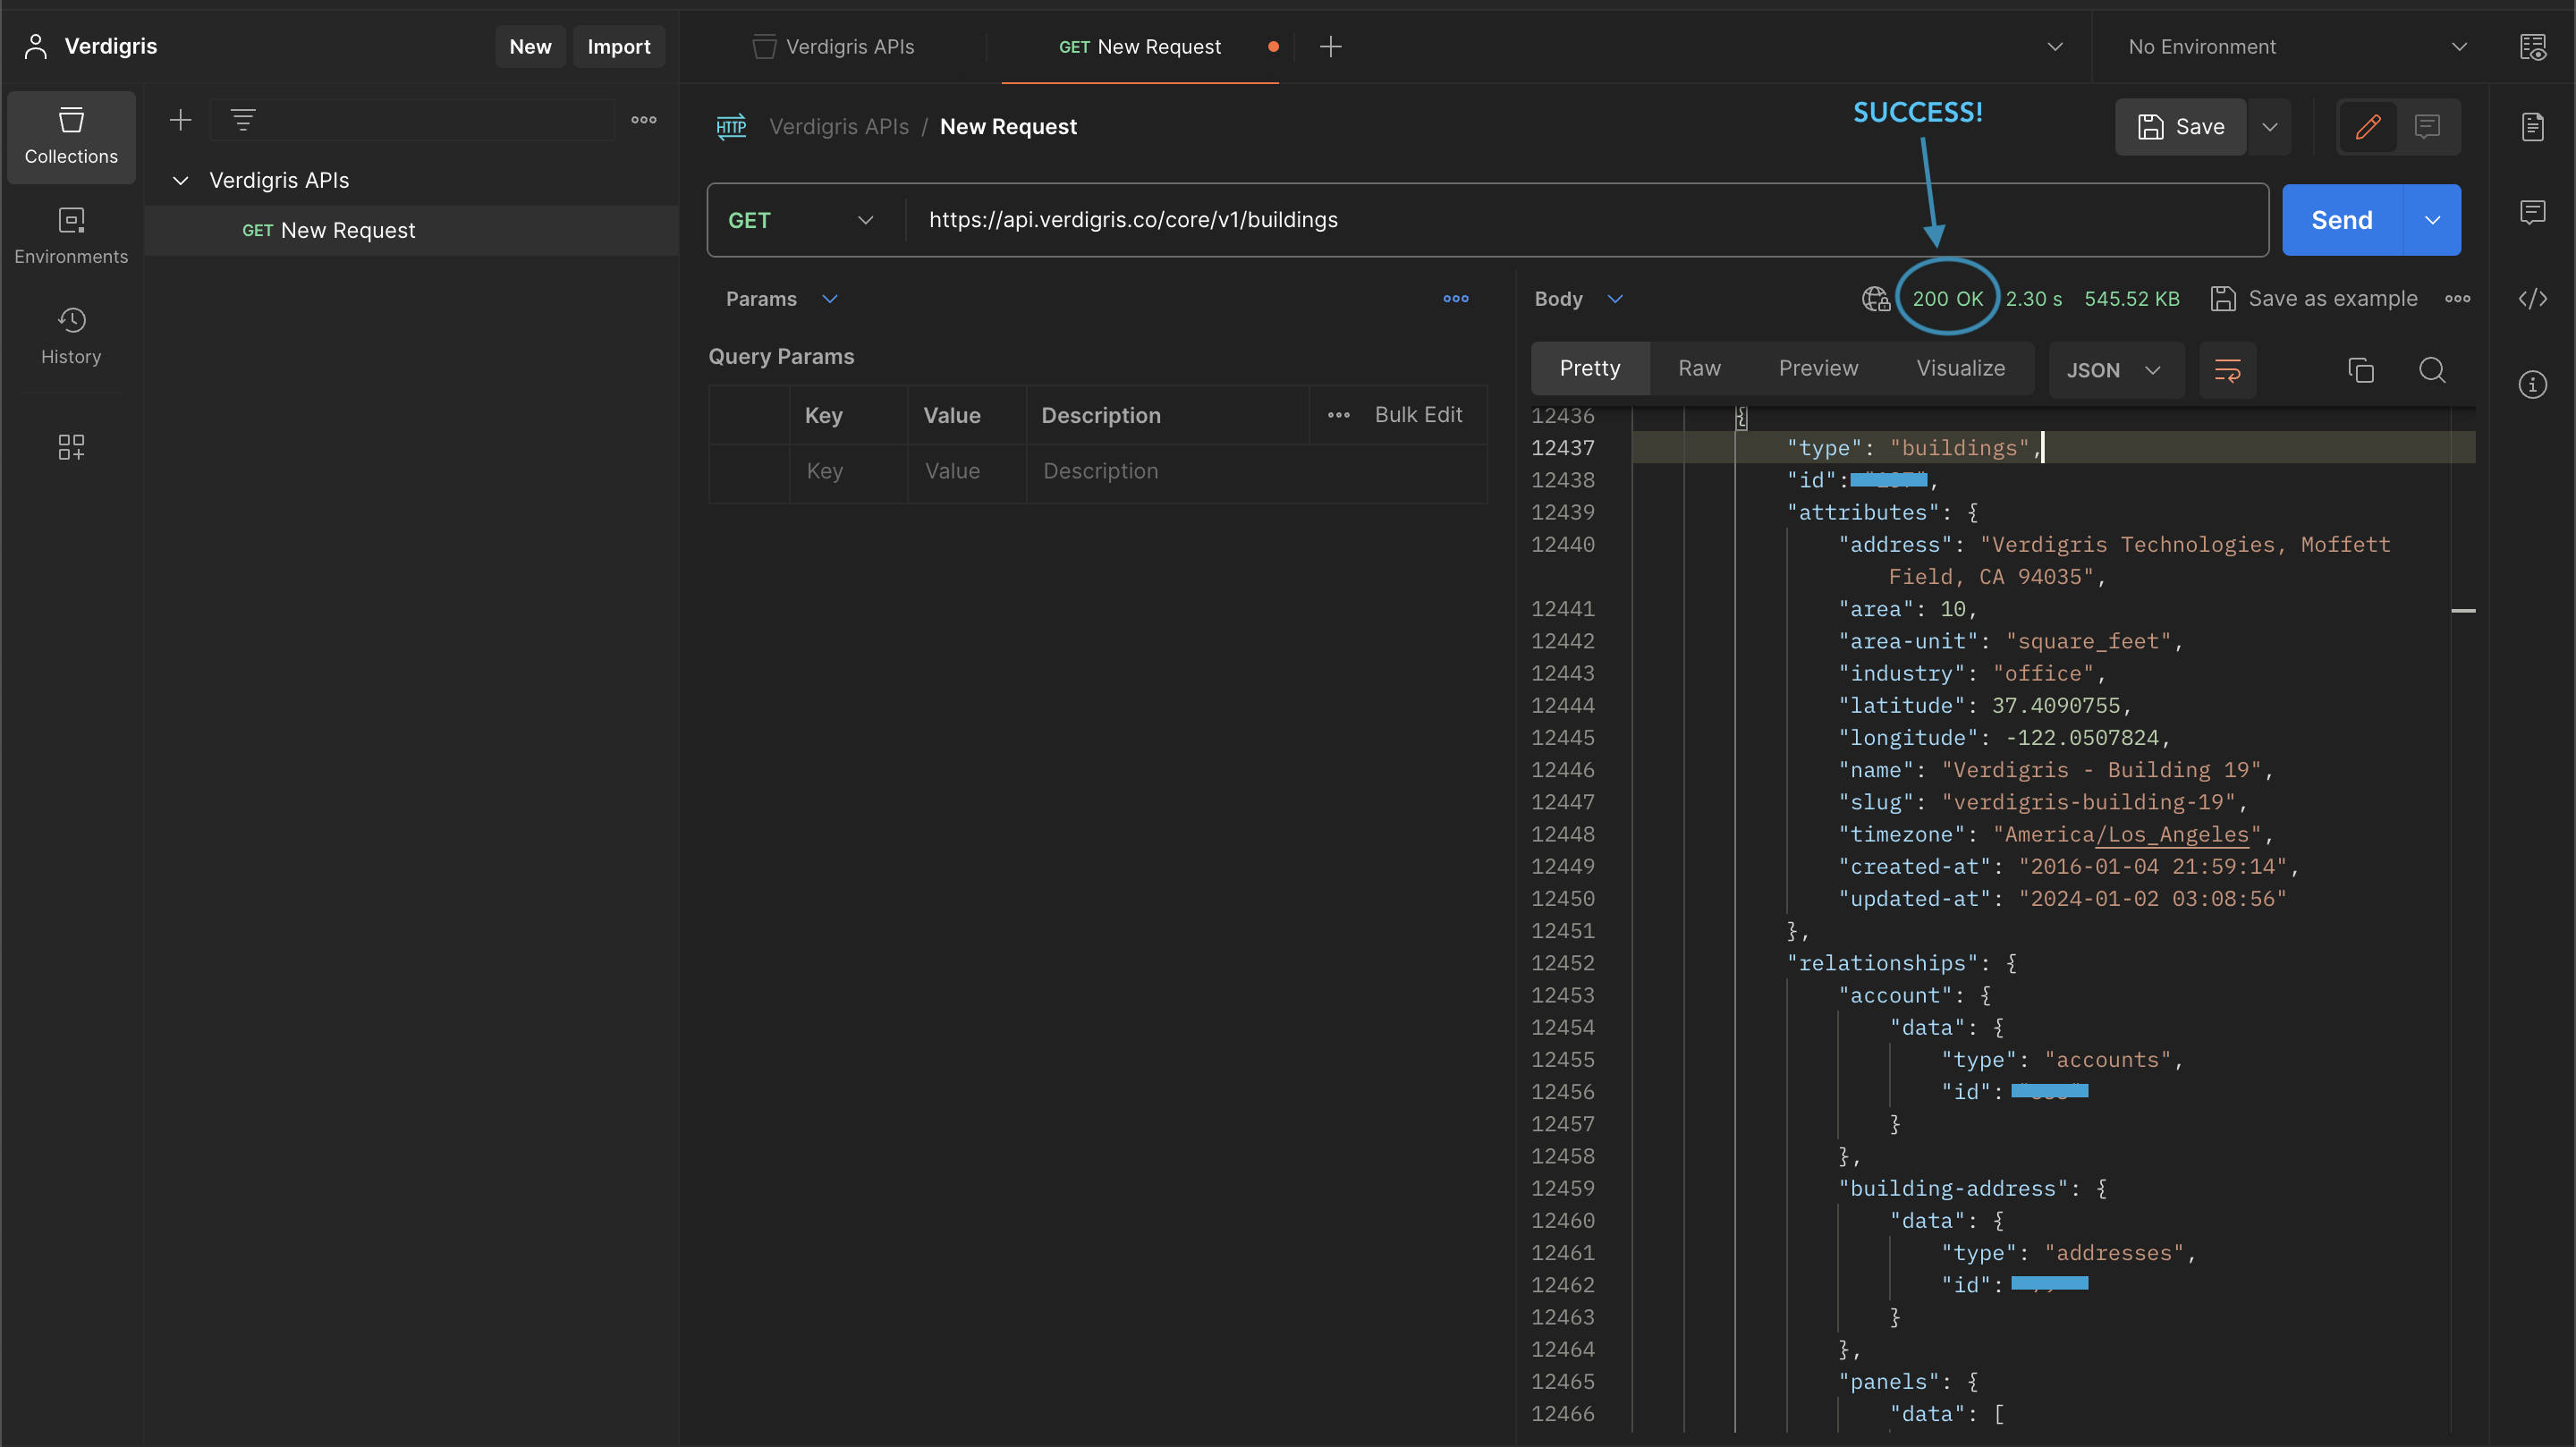
You can now add New Requests under the "Verdigris" Collection and start Sending API requests to the Verdigris servers. A "200 OK" response is considered a successful query.
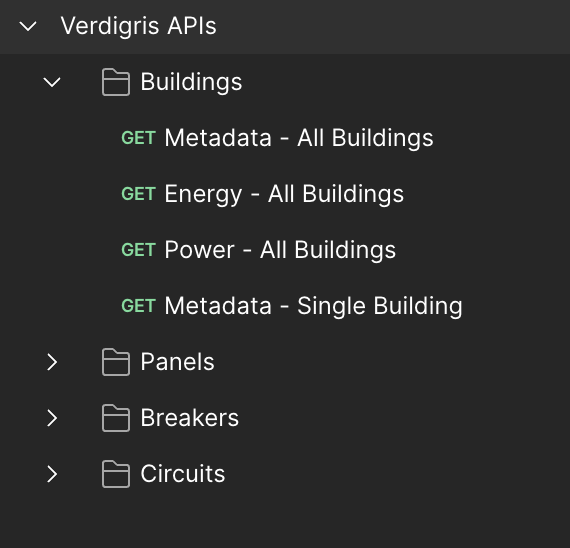
Pro Tip: Use "Folders" to organize the key queries. Above image shows a simple example of how a collection of Verdigris APIs could be organized. References for all public Verdigris API endpoints are found in our API Reference section.
If you run into any issues or errors, please take a screenshot and submit a request to your Verdigris Customer Success Manager or to [email protected] with the details of the query you are attempting.